VS Code is one of the most popular code-editor that currently exist. But, it is more than that due its huge array of extensions, which can transform it into a fully featured IDE going on par with the likes of IntelliJ and Eclipse, etc.
Now, let’s come the best part. Thanks to Microsoft and our Open Source community, VS Code can even run on a remote server controllable by a browser.
Currently, there are two open source projects that are available for this task:
- code-server
- openvscode-server
We are going to look at code-server for this tutorial but, openvscode-server is fairly similar.
code-server Installation
Let’s create a dedicated non-sudo (for security) user for running code-server:
sudo adduser vscode-userTo install code-server, we can run the following command from the code-server README.md:
curl -fsSL https://code-server.dev/install.sh | shOnce, the installation is finished, we can start code-server using the following command with the dedicated code-server user:
sudo systemctl start [email protected]Next, enable the code-server to run on boot:
sudo systemctl enable [email protected]code-server Configuration
Now, we will modify the configuration for code-server. The config file for code-server is located at /home/<code-server user>/.config/code-server/config.yaml. By default, the file will have the following content:
bind-addr: 127.0.0.1:8080
auth: password
password: e6ae26c31b32b13fb3fe5087
cert: false
As we can see, the default port is 8080, which is not ideal for us as we will proxy this through oauth2-proxy and apache2. So, change the port to any unused private port. We will be using 59232 as our preferred port here.
Also, since, we will be using oauth2-proxy for authentication, we can remove the default password authentication method for code-server. This is optional. If we want, we can have it enabled. For our example, we will remove it.
So, the file will then become:
bind-addr: 127.0.0.1:59232
auth: none
password: e6ae26c31b32b13fb3fe5087
cert: false
The cert option is not required, since, we will use the certificate configured at apache2.
Now, we have to restart the code-server service to apply our configuration.
sudo systemctl restart [email protected]oauth2-proxy Installation
Oauth2-proxy is an extremely versatile tool. So, we will only focus on configuring it for code-server with authentication via github, only.
Let’s install oauth2-proxy using go.
First, we need to install go:
sudo apt install golang-goThen, switch to the code-server user.
sudo su vscode-userWe can use the below command for installing oauth2-proxy:
go get github.com/oauth2-proxy/oauth2-proxy/v7If the above is not working, then we can use this:
go install github.com/oauth2-proxy/oauth2-proxy/v7@latestThe oauth2-proxy binary should get installed in the directory:
/home/vscode-user/go/binoauth2-proxy GitHub Setup
For setting up GitHub oauth2 using oauth2-proxy, we need to first create a github app. Go to Developer applications (github.com).
Then, click on New OAuth App.
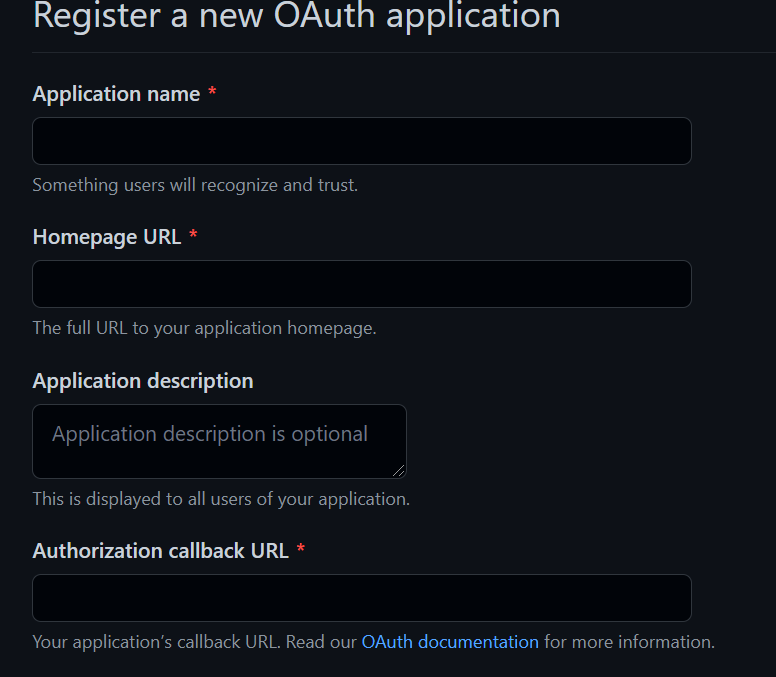
Here, in Authorization callback URL, let’s enter our domain/subdomain, on which code-server will run as below:
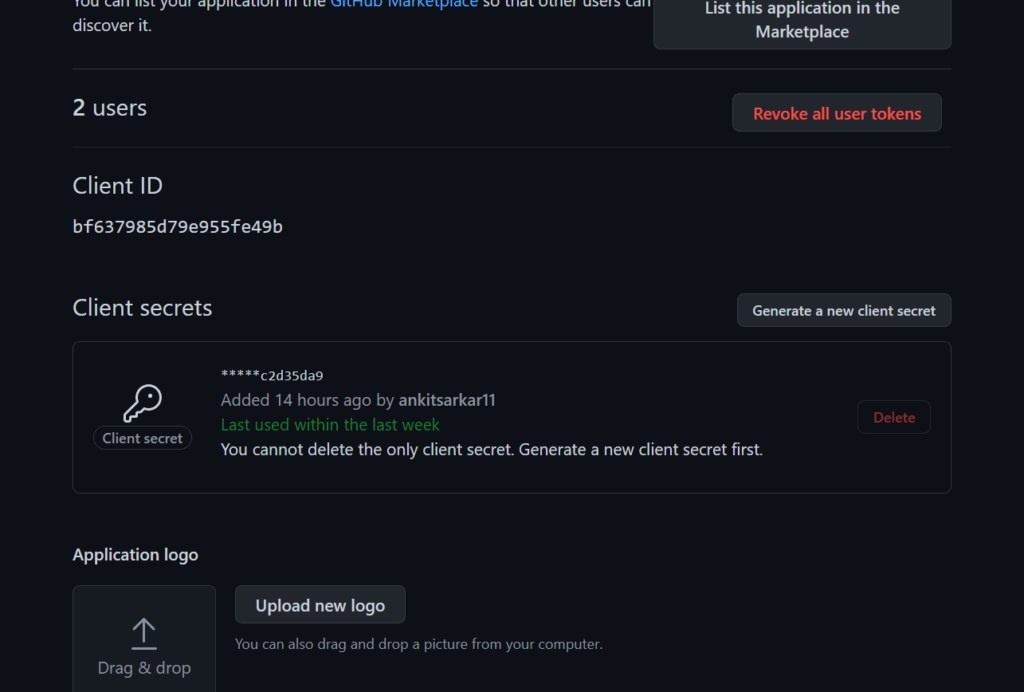
https://<example.domain.com>/oauth2/callbackAfter filling the remaining details and let’s click on submit. Now, we need to go to our created Oauth App page and click on Generate a new client secret button. Take note of the client id and secret.
oauth2-proxy Configuration
The oauth2-proxy command-line configuration looks like below for github:
./oauth2-proxy --email-domain=* --http-address="0.0.0.0:61634" --proxy-websockets=true --upstream=http://127.0.0.1:<code-server-port>/ --cookie-secret=<strong-32-bytes-secret> --cookie-secure=true --provider=github --github-user="<your-github-user>" --reverse-proxy=true --client-id=<github-client-id> --client-secret=<github-client-secret> --whitelist-domain=<example.domain.com>In the above, replace all the text with <> with proper values. In –http-address, we are using a separate internal port 61634 for running oauth2-proxy which we can route through an Apache2/Nginx proxy.
Once, the above command is edited completely, we can run the command in the /home/vscode-user/go/bin directory. This should enable the proxy and is available at:
https://<example.domain.com>:61634The port 61634 can be exposed to the public internet and directly used if, we don’t want to use any reverse proxy like Apache2 or Nginx, etc.
Final Thoughts
The tutorial only explains up to the configuration of code-server with outh2-proxy. After that, the proxy can either be exposed to the internet and accessed directly or routed through a reverse proxy like Apache2 or Nginx. I will explain this in a future tutorial.
Please note: Do not expose the code-server port to the internet at any cost, that’ll completely defeat the purpose of using oauth2-proxy.
Adios!